Miller Technology Professionals offers an easy-to-use support portal for creating, managing, and tracking support requests. Follow this step-by-step guide to create your account and access the support portal.
Step 1: Visit the Support Portal
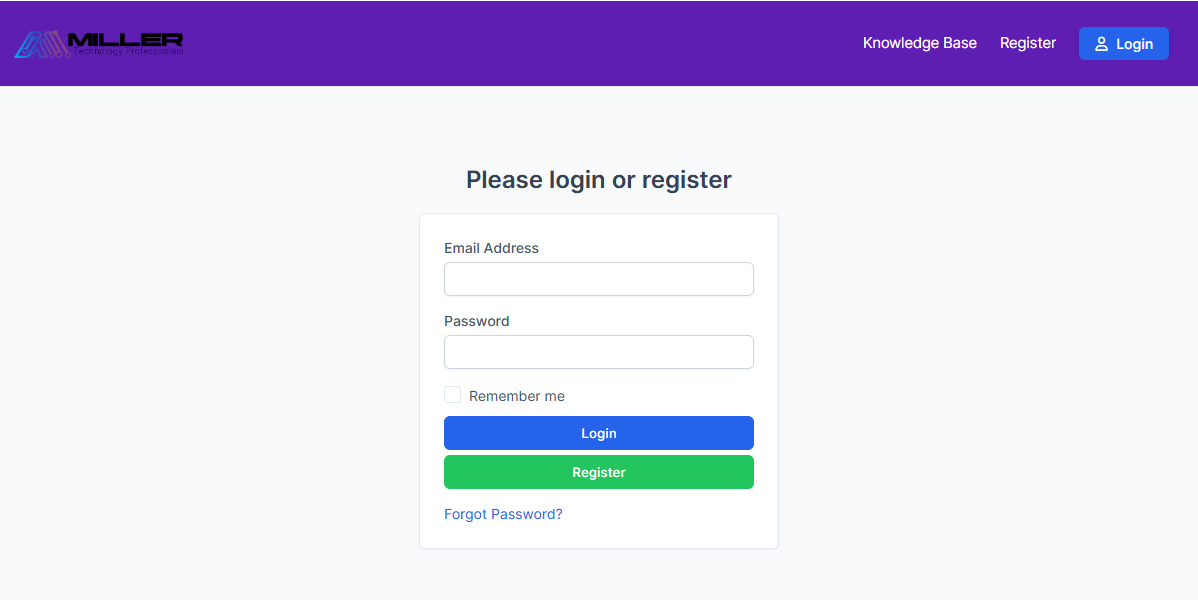
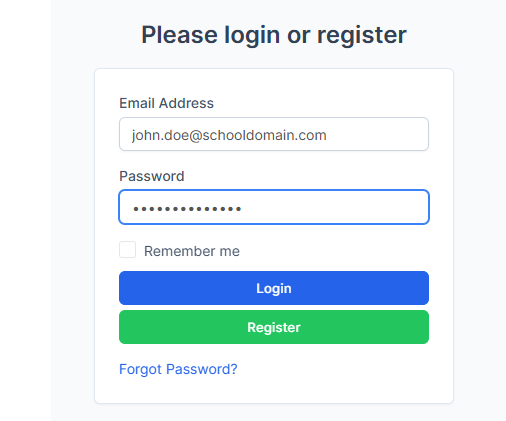
Navigate to the Miller Technology Professionals support portal by visiting the Support Page. You will be greeted with a login screen.
Step 2: Register for an Account
If you don't have an account, click the Register button to begin the registration process. This will redirect you to the registration form.
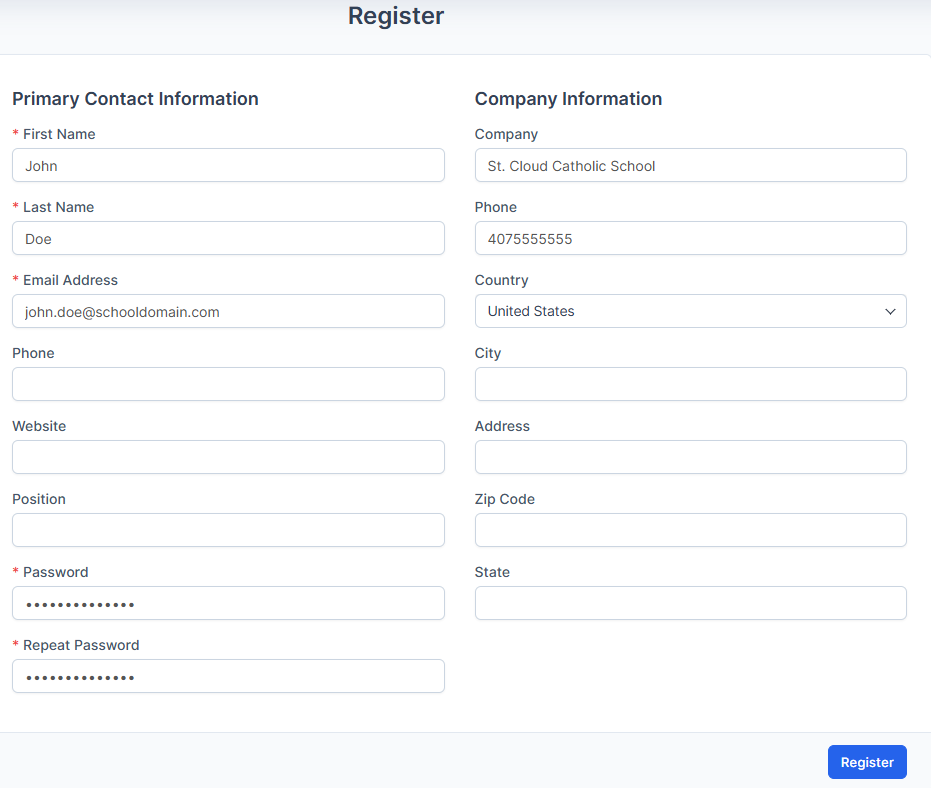
Fill in the following details:
- Primary Contact Information
- First Name
- Last Name
- Email Address
- Phone (optional)
- Position (optional)
- Company Information
- Company Name
- Phone
- Website (optional)
- Address
- Country, City, State, and Zip Code
- Password
- Create and confirm a secure password.
After completing the form, click Register.
Step 3: Verify Your Email Address
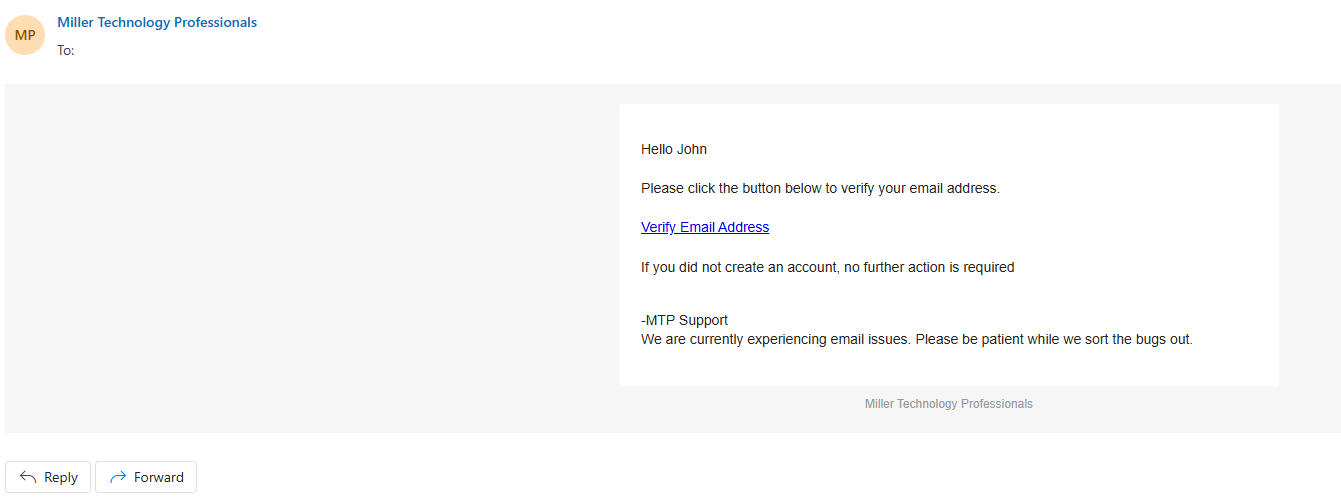
Once registered, an email will be sent to the address you provided. Open the email and click the Verify Email Address link to complete the verification process.
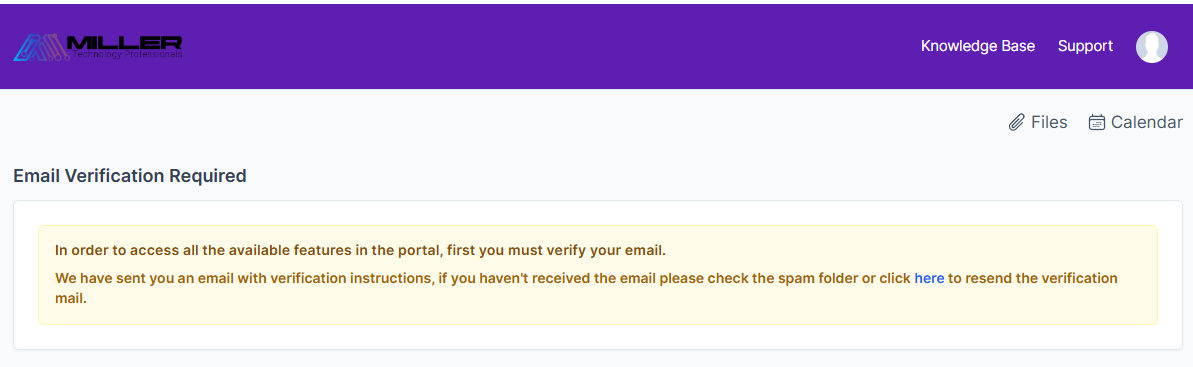
If you cannot find the email, check your spam or junk folder. Alternatively, go back to the portal and click the resend verification mail link.
Step 4: Log In to the Support Portal
After email verification, return to the login page. Enter your registered email and password, then click Login.
Step 5: Explore the Support Portal
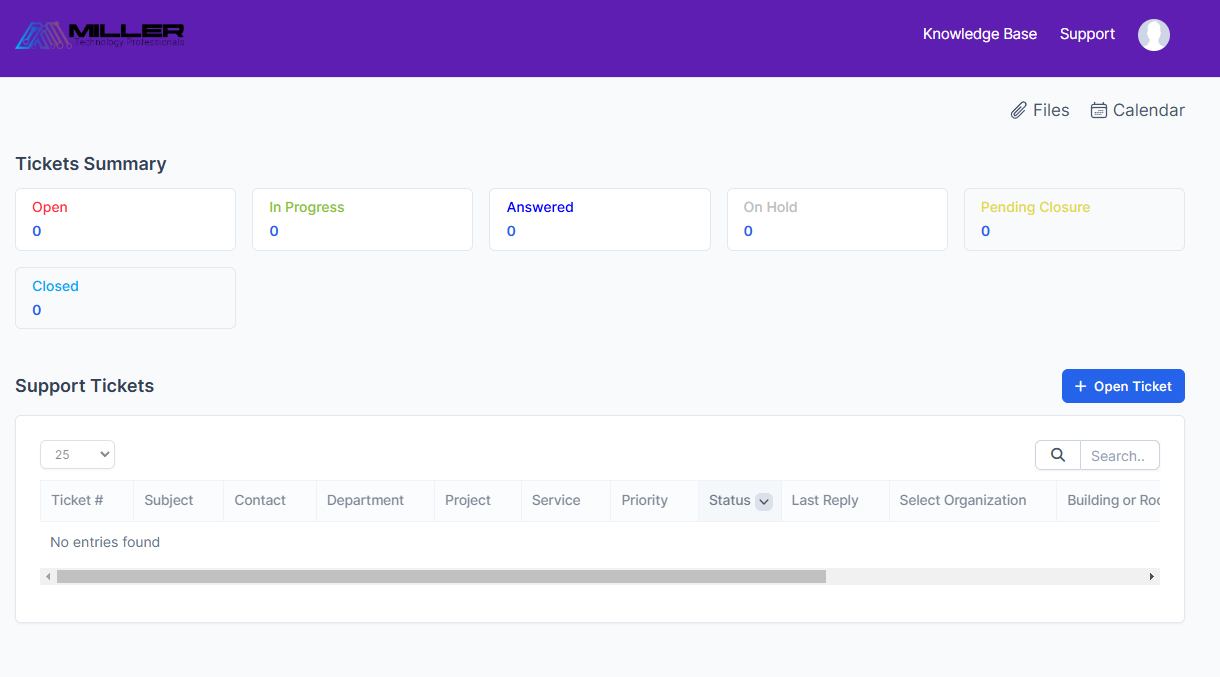
Upon logging in, you will see a dashboard summarizing your support tickets. From here, you can open new tickets, track existing tickets, and access additional features like files and calendar integrations.
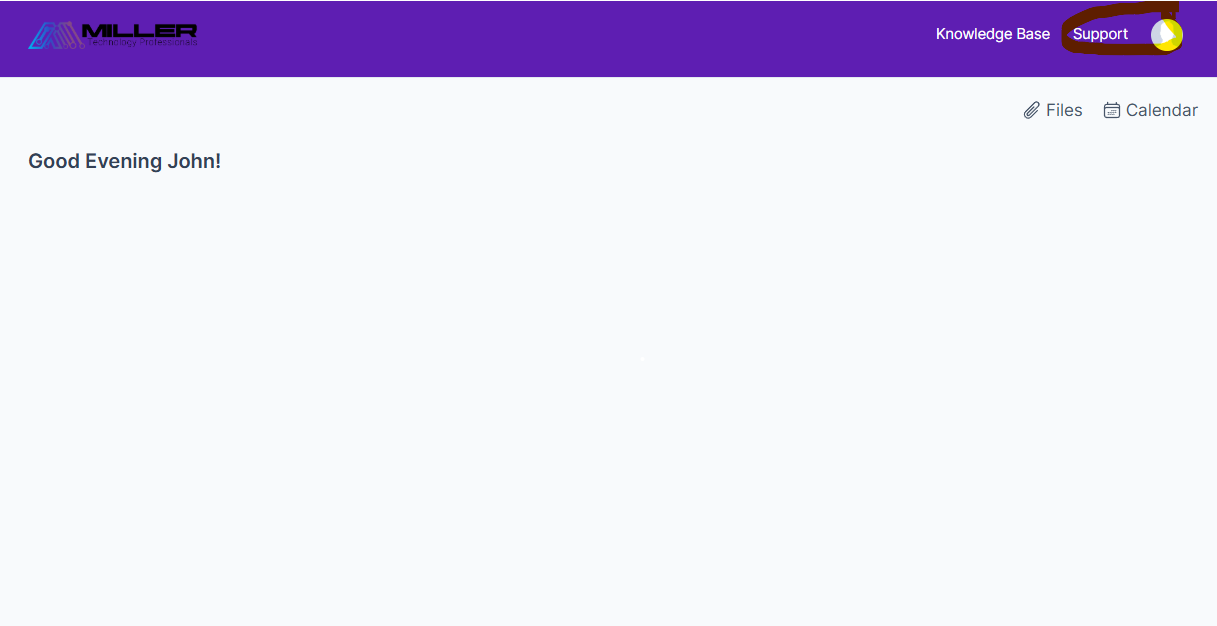
To access the support options, click the Support button in the top-right corner of the portal.
Additional Tips
- Remember to check your Knowledge Base for self-help resources before opening a ticket.
- Keep your account information up to date for better service.